Showing posts with label frugal. Show all posts

Friday, December 13, 2013

This Week.....

.... we have enjoyed an early family Christmas celebration...

All very busy opening presents.
.... we have celebrated Eden's fifth birthday...

Please forgive me for the paper plates and cups - at least we could compost them afterwards!
Birthday Girl.
Enjoying the very talented face painting by a clever kindy mum.
Eden's tiara birthday cake.


.... we have done some Christmas crafting, by ourselves and with some local friends...


The spice angels we made with our friends.
Christmas cards the kids made with their Grandma.
.... we have coped with the current heatwave by going swimming and relaxing...


.... we have had Grandma over for a stay...


.... we have enjoyed cricket and homemade beer...


Even Brannen has taken his place on the couch to watch the 'kiyet' (cricket)
.... we have done some Christmas cooking...

Gingerbread Christmas tree decorations.
.... we have made some Christmas gifts...

Lined tote bags for the girls to carry their swimming gear to swimming lessons.
My first attempt at a reversible tote with box corners - happy!
 ....receiving my university results. One distinction, and two high distinctions. I am very happy with that. I am changing my course slightly for 2014 onwards, to a double major in Sustainable Development and Community Development. I am slowly hatching ideas and plans for my future 'career' (or not) direction and am very excited about what the next few years may bring.

.... the lead up to Christmas is so exciting! What have you and yours been up to?

Wednesday, December 11, 2013

Chicken Business

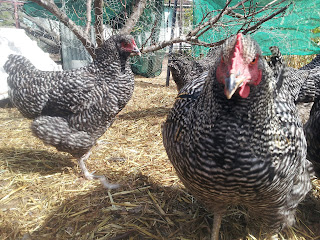
Our first batch of little chicks grew up..... into five roosters and one hen. We couldn't keep all the roosters so they were destined for the freezer. Their father, our main rooster, also needed dispatching, as he is now directly related to most of the hens in our brood. We also have received roosters for eating from a couple of local friends, so Nath has spent the last few evenings killing, plucking, and processing chicken meat. Tonight will be a big night - Nath and a friend have the last of them to get through, nine roosters and a drake (which will end up on the Christmas table). We'll have enough chicken meat to see us through a few months I would say.


Killing our roosters left us with a role to fill. We selected one of the roosters we had received from friends to fit the bill of our new head rooster. He is currently terrified of us, and wary of the chickens, but he has been working his way up the pecking order, one by one, so I am sure he will settle in at the boss spot soon. He's quite a pretty little thing, too, so different from the Plymouth/Australorp roosters we have been used to. Eventually I will get another big meat breed rooster, and maybe run two pens of chooks, but for now this new fellow will do. He is a Rhode Island Red/Isa Brown cross. Hopefully he throws more girls than the last boy did!

Tuesday, November 26, 2013

Frugal Christmas Gifts: Paper Covered Wooden Letters

With a month yesterday until Christmas, exams finished for the year, and my determination to give Christmas gifts that are secondhand or handmade, I have some serious crafting to do! A while ago a friend of mine gave another friend's little girl some gorgeous paper covered letters to make up her name that will look stunning on her bedroom wall. It reminded me that I had, somewhere in the depths of my sewing room, some large wooden letters of the girls' names and decided to make something similar for their Christmas gifts.


I went shopping and chose a pad of fairy-ish, butterfly-ish coordinating scrapbook papers and some embellishments to match. All up it cost me less than $30 for enough supplies to make both girls' gifts (but I already had the letters). I started by choosing the papers I wanted to use for each letter and tracing the upside down letter onto the back of the paper. I then very carefully cut the letters out.


 I applied an even layer of PVA glue to each wooden letter and smoothly pressed each paper cutout on, taking care not to leave bubbles in the surface. When the glue had dried, I trimmed any overhanging paper with a craft knife.

I used some fine sandpaper to sand the edges of the letters, giving them a more 'finished' appearance and preventing the edges from peeling back. Nath (who has had far more experience with spray paint than I) sprayed two coats of a silver glitter laquer to each letter.


I then arranged and superglued the embellishments, including some tiny little rhinestones for some extra shine.


The girls' fairy name letters look just as good as any that you could buy at the shop, and were a fraction of the price. I think the girls will love them.

One gift down, many more to make!

Saturday, October 19, 2013

Bees.

I used to be scared of bees. If one flew near me, I would freeze and stop breathing until it had gone. Nowadays I see bees as friends, useful little insect friends with a very important job to do, and I love their presence in our garden. We have a lot of bees here, but the next step for us was installing our own hive, so that we could collect honey from it, another thing that we will no longer have to buy. As we use honey instead of sugar in our family, it seemed like a sensible thing to do.

We've been on the wait list for bees for a few months now, and yesterday, we got the call. So Nath and Brannen drove down the hill to collect our very own bees, a buzzing, humming closed hive of activity. The entrance to the hive was obviously blocked so they wouldn't escape during transit, but you could see their busy little legs and wings in the tiny holes in the hive 'gate', desperately trying to get out.

 Nath placed the hive in our chosen spot, under the grevillea bush in the otherwise unused pool area. It's a great spot - morning sun, afternoon shade, and locked so the kids can't get in. Once we demolish the pool, down the track we'll be able to get a couple more hives and the old pool area will become the bee area! Nath carefully opened the little gate to let the bees out to explore, and in a week or so he will open the hive to make sure the queen is healthy and laying, then we will leave them for a few months to do their thing. We have to get a couple more hive boxes ('supers') so that they can expand and have room to produce lots of honey - for them and us!

I may not be scared of bees anymore (well, not much, anyway!), but the actual beekeeping part is definitely Nath's job!

The beautiful grevillea.
 We are feeling pretty happy with how our garden and home plans are going, as we are well underway to producing a lot of what we eat here at home. It is such a fantastic feeling to be so connected to the food we eat.

Tuesday, July 16, 2013

Things I Have Been Learning About Lately.

My head is so full of new information this week! I really should be enjoying this last couple of weeks before Uni starts, not filling my mind with all kinds of topics, but it gets a little addictive. My internet tabs bar is very busy, and I thought I would share some of the things I have been researching.

Registering our property for livestock ownership: The WA Department Agriculture and Food requires anyone who owns livestock to register their property. This is to make tracing and isolating disease easier, and applies whether you own one tiny, little miniature goat, or 20,000 head of cattle. I have the forms here now and am excited at how close we are getting!

Adding non-nano zinc oxide powder to homemade body butter to turn it into a homemade, natural, safe sunscreen. Safe, commercial sunscreens cost about $20 for a rather small tube, so I decided to look into whether it was possible to make my own. Turns out, it is! I found a recipe here at My Healthy Green Family and discovered I could buy the zinc oxide powder on Etsy. Summer is a way off yet, but when it hits, I will be ready!

Making my own vanilla bean paste (saving me a bucket load of money!): This may be extravagant of me, but I just can't do without buying vanilla bean paste. I use it in so much of my cooking, but it is one of the most expensive items on my shopping list, at over $20 for a very small jar. I can buy vanilla beans much cheaper, though, and this recipe I found at Tick Of Yum makes quite a lot of paste. Much cheaper! It is a Thermomix recipe (I do love my Thermomix!) but could probably be recreated on the stovetop.

Making beeswax-coated cotton food wraps: It has been a long time since we have bought plastic cling-wrap, and the food-safe pouches I bought a couple of years ago are starting to be... er... not so food safe! Since I bought mine, they have become all the rage, though, so the prices are a lot higher than I remember! I wanted to recreate them in a much cheaper way, and today I found this tutorial at My Healthy Green Family that uses beeswax to coat the cotton. I have a big block of beeswax, and once we have honeybees, beeswax is something we will have more of. I'm going to give this a go.

Planning and creating a productive permaculture food garden: I have been watching a DVD I actually bought from a friend quite a while ago, and never got round to actually viewing. It's ABC Gardening Australia's Permaculture and Organic Gardening. It documents Josh Byrne (love him!) transforming a 1000sqm Perth yard into a beautiful permaculture dream. It has inspired me so much and given me lots to think about as we move forward with the planning of our own gardens. I highly recommend it if you are gardening-minded.

What to do with a broody hen: My little old silky hen is 'on the cluck' again but this time we actually have a rooster (hopefully) sterilising (obviously I should have written fertilising!!) the eggs that all our girls are laying, so I have decided to let her sit on a clutch of about seven or eight and see what happens. I've marked the eggs she can keep with a permanent marker so I know which ones have been there for a while. If all goes well, this will be our first batch of chicks that we have had hatch out here. The only problem is, she has developed a nasty little attitude and is scaring all the other hens off the nest, so I am going to have to move her to her very own brooding box. I plan on putting her in our chicken tractor, but was worried that if I moved her, she would abandon the nest. A quick google search informed me that if I move her at night time, my chances of success are much higher. Fingers crossed that in a few weeks we will have a little clutch of cheeping chicks running around here!

I do love learning, and i am so excited about starting my Sustainability degree in a couple of weeks' time! I have no idea where it will lead me, but I am going to enjoy the ride! What have you been learning about lately?

Sunday, July 14, 2013

Fabulous Friends, Frugal Living, Fruit Trees and a Recipe for Foaming Hand Soap.

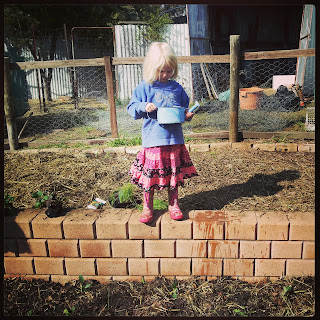
 As I type this glorious Winter's day, it is 23 degrees and the sun is shining. After two late nights in a row, all three kids are sleeping and Nath is in the backyard finishing up planting out leeks, onions, beetroot, silverbeet, spinach, cauliflower, garlic, carrots and beans. We have put two new rosemary bushes in the ground and transplanted a third one from where the goats will be to one of the new food-producing beds. Dispersed through the vegie beds are some Sweet Alice seedlings, which attract helpful predators and bees to the garden, helping with pollination and keeping pests in control. We have also planted some pyrethrum, which will repel garden pests, and I can dry the flower heads and steep them in alcohol to make a personal insect repellant. Very useful around here in Summer.

I enjoyed spending a birthday voucher at the garden shop!
My girls are such pretty gardeners!

The garden shed is getting an overhaul today as well, which is just as well because for the almost twelve months that we have been here, it has become a dumping ground for things we aren't really sure what to do with. Time to make some decisions! We will be building a potting bench and setting up the mini-greenhouse so that as soon as the frosts disappear, we can begin propagating seeds for spring planting. I'm collecting all of our toilet rolls in readiness - the seeds grow nicely in them with some potting mix and the toilet roll can be planted directly into the ground when the time comes.

The embarrassingly messy garden shed pre-clean.
We are nearly done, just the shelves to build.
Our growing array of deciduous fruit trees will be planted this week, and the front yard will begin to take shape as the orchard. We will be planting nasturtiums all around the base of the fruit trees to deter common pests and bring in beneficial insects (also, it just looks pretty!) We will plant all the citrus trees in Spring. I can't wait for the apple and pear trees to begin blossoming.

Nasturtium flowers.
 Yesterday, after spending the morning in the garden, I went to a lovely friend's house to help her prepare cupcakes for a kitchen tea while Nath helped her husband change his brake pads and discs. Afterwards, we shared a meal together. A few weekends ago, the same friends came and helped us for a whole day build our fence around the vegie beds and lay out some of the beds. I am loving building great friendships with people who have similar goals to live more simply and make do with what we have, sharing skills and resources and encouraging each other along the way. It doesn't matter if our reasons are to save money, improve our health, reduce chemical load or be gentler on the environment. It's a little like a train; if you are pulling one of those carriages, the others will come along, too. It's exciting to share ideas and learn from each other, no matter which of those values is our 'main motivator'.

Given that Nath only has nine working days left (yay!), I have ramped up the money-saving activities around here. Yesterday I made a lavender foaming hand wash and put some citrus peels in to steep in white vinegar, which after two weeks will become a citrus spray-and-wipe-style cleaner. I was so pleased with how the hand cleaner turned out, I wanted to share the 'recipe' with you.

Using recycled jars - not as pretty but definitely cheap!
In a small saucepan half filled with water, I grated some Velvet soap. I used a leftover piece from making laundry liquid, it probably would have been about a quarter of a bar. I stirred it over medium heat until the soap was dissolved, then strained the mixture through a sieve into a bowl and left it to cool.

When it's cooled down, this liquid solidifies into a jelly-like substance. To this I added a splash of lavender oil (available in the cleaning aisle of the supermarket) and about a cup of water. I poured it all into a blender and 'jooshed' it for a minute or so, until all blended.

I poured mine into a foaming dispenser I have from a previous shop-bought hand soap, and had enough left over for three more refills. You could use any pump dispenser but the foaming ones use less than regular pump ones. All up, it would have cost me only a few cents and feels lovely on my hands.


I hope you are all having a lovely, productive weekend, and if you have any more frugal, DIY tips, I would love to hear them!


Thursday, July 11, 2013

Backyards, Bees, Buttons and Having Husbo At Home!

This little creative space of mine has been so neglected lately. There is no very good reason for that, just the days slipping so quickly past us and a dodgy camera cord (blogging without photos seems a little boring!)

I guess the big news for us is that Nath finishes full time work on the 19th of this month, and then only has two weeks of part-time work until he is done for good! This is a hugely exciting change for us, as it will free up so much time for us to work together on our goals and family values, work in the garden, produce more of our food from home and enjoy our children growing up. Nath and I will both be studying - Nath will completing his Masters in Mental Health Science, and I will be commencing a new Bachelor course in Sustainability. We will be living on Austudy and Family Tax benefits and making do with what we have. It will be tough, but we have been doing a lot to prepare and we feel we are up to the challenge!

One of the biggest things we have been working on is transforming our backyard from an expanse of resource-thirsty lawn into a landscape capable of producing much of our own food. We have been dipping our toes into the principles of permaculture (and loving the learning around this!) and have created a series of raised, no dig garden beds around mulched garden paths. Most of the materials we used were 'found materials' - horse manure and used straw from a friend's farm, newspaper and cardboard from our local recycling skips, bricks for garden edging from Freecycle, and compost, leaf litter and chicken manure from our own garden. Nath and a good friend built a fence from recycled copper logs, chicken wire and old timber palings from the property's original boundary fence. This fence will (hopefully) keep our free-ranging chickens out of the food producing section of our garden, allowing them access to the orchard and most other parts of the yard.

Before we began, after killing most of the grass off over summer.

Starting the paths with free mulch from the local tip.

Two of the beds built up and waiting to compost down.

Two gorgeous garden helpers.

One side of the garden, done.

Mum watering in the mulch on the newest bed.

Backyard landscaping complete, ready for planting.

Our new fire pit.


Nath building the fence with some 'helpers'.

So cheap and so rustic!
 Speaking of chickens, our chooks are all co-residing happily in the big pen at the back now, free-ranging during the day, and the temporary pen has been dismantled in readiness for the arrival of our mama goat and her baby. We culled all of the roosters except one, and he has taken to his role of flock caretaker with relish. We are being rewarded for our love of these dear creatures with four to six eggs a day.


We are extending our 'livestock', as I have written about before. This week, I ordered our first swarm of bees and a beehive to house them in. We are all very excited about this, especially Eden, who is now a bee 'expert' after spending a term at kindy learning all about them. Hopefully our buzzy friends will be joining us in November. Our mama goat and her yet-to-be-born baby are due here in September.

In other news, I recently took part in a Button Swap that was held over at lovely Taz's blog Butter and Buntings. My swap partner is not a blogger, so I can't link to her, but she perhaps should be! She is a beautifully creative person, and the sister of a very beautiful friend of mine, and I would like to share with you some of the loveliness she put into my bundle of buttons. (I'm afraid my return parcel wasn't nearly as pretty or creative, so I won't share photos of that!)

So beautifully packaged.

So many buttons! All stitched onto vintage-inspired card.

I absolutely love these wooden buttons! So cute!

My button collection has never looked so pretty!

Thanks, Taz, for the fantastic swap, and thanks, Erin for my beautiful buttons!
Related Posts Plugin for WordPress, Blogger...